Food and water storage on a tight budget
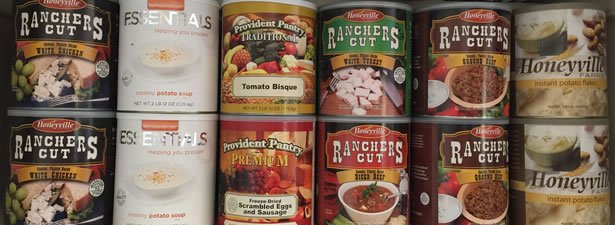
The idea of getting started in prepping, and more specifically food and water storage can be a bit overwhelming. There is so much to learn and so much to consider, especially if you are on a tight budget where every dollar matters. Sure you can purchase a little of this and a little of that, building up your cache over time. But is that really the best way?
First off, let me be perfectly clear that I am far from an expert on emergency preparedness, and more specifically food and water storage. I am however a long-time student of preparedness who has made plenty of mistakes over the years, and made a few observations along the way that I would like to share. The purpose of this article is to garner some attention and start a discussion on the subject with some fellow preppers.
 When I first started prepping and coming up with my preparedness plan, I felt that it was imperative to set the parameters that I would be working with first if it had any chance of being successful. As began to envision the plan, I like to consider the most common things first and then build off of that as the plan grows.
Initially, my plan provided for a family of four with three large dogs, and four additional family members that live nearby, but would never consider prepping for themselves. Some might consider not including them in the plan. However, I felt it much better to err on the side of caution and include them anyway. After all, having more food and resources than you actually need is definitely not a bad position to be in. As far as the animals, they are family and need to be accommodated in the plan.
To simplify things, the scenario that I am planning for here will provide the opportunity of staying home rather than forcing us to bug-out, but food, water and municipal services might not be available for at least six months. Therefore, the shelves in grocery stores would remain bare, gas stations empty, and natural gas, water and power services would remain nonexistent for some time. Much like what happened during hurricanes Sandy and Katrina, textbook examples of the importance of emergency preparedness.
Whether or not any of the nightmares that you are planning for are caused by a natural disaster, major power grid failure or a complete economic collapse, you will still need the same basic necessities to keep you and your family alive. Even when considering more elaborate contingencies like nuclear, biological, or chemical fallout, volcanic eruptions, or a zombie apocalypse, the basic necessities remain the same, so I find them to be the best place to start.
Accounting for the Wilderness Survival Rule of Threes is key to successful emergency planning. You cannot survive for more than 3 minutes without air, 3 hours without shelter, 3 days without water and 3 weeks without food. While the first two of rules are certainly the most immediate, the focus of this article is really on the latter two as food and water storage tend to go hand in hand.
Water Storage
Three days without water is all you have before your body starts shutting itself down. Severe dehydration can even cause permanent damage to your organs. The human body needs 2-liters of water each day to sustain itself under normal conditions, and even more during intense activities and in hot weather. Every preparedness plan must take this into account. However, even storing three months worth of water for a small family is really not very practical, unless you have a large pool or a storage pond on your property.
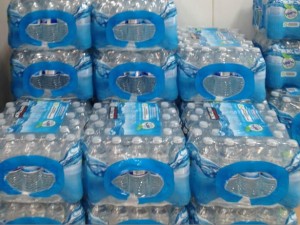 By nature, water is very heavy and it takes up a lot of space. But it is an absolute necessity to keep as much as you can on hand, even if that is only a few gallons per person. There are many different kinds of space-saving storage containers available on the Internet these days to help address some of the spatial storage problems, from small emergency water pouches and assorted neatly stackable cubes to plastic tub liners and 55-gallon barrels, all of which can be used to increase the amount of clean potable water on hand.
Just adding 1/4 teaspoon of regular chlorine bleach per gallon of clear water is enough to purify the water and ready it for storage. For best results, cloudy water should be filtered prior to treatment.
I feel that it is much more practical to know where all of the local water sources are located, and to have a good quality water filter to render it safe to drink. Out in the field, there are many personal water filter options that are compact, portable and lightweight from straws like the Survivor Filter Personal Water Filter, to pumps and bottle filters. When it comes to filtering water for larger groups, there are many gravity filter options that sit on a countertop like the TivaWater Home Water Filter. However, they are far less portable.
On the other hand, if you happen live near the ocean or water nearby is contaminated, having a good desalination unit would be an outstanding appliance to have, especially if it was solar-driven. There are many DIY plans available on the Internet that could work perfectly for this. If you can turn plain old seawater or contaminated water into clean potable drinking water fast enough to sustain those that you are planning for, you are way ahead of the game and one step closer to being completely self-reliant.
Food Storage
Even though the human body can typically survive for a few weeks without food, starvation beyond one or two days will immediately begin to affect your metabolism, muscle mass and brain function, becoming more severe as time goes on. With moderate to heavy activity, it takes somewhere between 2000-2800 calories to sustain the average man each day, and 1600-2200 calories to sustain the average woman.
 My plan assumes that each day would likely result in a moderate amount of energy spent gardening and gathering resources putting us somewhere in the middle of the range most days. Furthermore, I needed to consider the caloric intake necessary to sustain the animals. For dogs weighing somewhere around 80 pounds, you would use an equation similar to [70×(80/2.2)^0.75×1.6 = 1658.5] to determine each Maintenance Energy Requirement (MER).
So now I have a few numbers to work with… I have to prep for as many as 8 people and three large dogs that will need somewhere around 2000 calories each on average per day. Even though most MREs and emergency rations are designed to provide only 1200 calories per day, I prefer to plan conservatively rather than plan to use the minimum and always come up short. This also provides us with some room to further stretch our rations if necessary.
I find that when I set my storage goals too aggressively, the entire plan tends to become overwhelming, especially early on. I’ve always had much better success taking smaller steps, setting new goals as the old ones have been achieved. In this case, I started off by setting a goal to provide enough food and water to sustain everyone for at least three months, and then I would set a new goal to extend it by another three months once I was able to reach it.
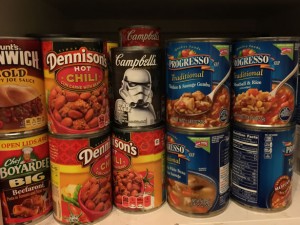
At first, my wife and I took the most obvious approach for a beginner because purchasing a cache of this size would cost an enormous amount of money, and there was no way that we could afford it all at once. As a result, we started buying a few small items that were on sale each time that we went to the store. A can of soup here, a box of Top Ramen there. I organized our cache in a way that I could rotate our stock more easily. But as our storage cache began to grow, we continually found it more and more difficult to stay in control of it all.
It felt like the continual creep of the expiration and “Best By” dates controlled us instead. More times than I care to admit, we ended up giving away much what we couldn’t use ourselves before it expired, and throwing the rest away. I knew there had to be a better way.
As a technical consultant and software engineer by trade, I decided to use a technical approach to tracking what food we had on hand, what food that we still needed, and what food items provided the best bang for the buck so I created a simple spreadsheet with some columns and calculations to make sense of all the data.
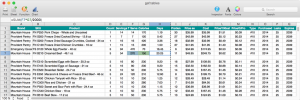 The first few columns of the spreadsheet are mostly for descriptive and tracking purposes, consisting of the location, brand, SKU, product name, type, year of purchase, year of expiration, and so on. The second set of columns, however, are where all of the magic happens. These columns consist of the item count, number of servings, total number of servings, number of calories per serving, number of days @ 2200 calories, grams of protein, price each, total cost, price per 100 calories and price per gram of protein.
This spreadsheet design not only allows me to track what foods that I have in on hand and when it expires, it also allows me to see what I paid for it the last time that I purchased it, what it cost per 100 calories, and what it cost per gram of protein. Early on, I figured that it would be best to focus on higher caloric, higher protein foods first because they would help us to reach our goal much quicker and for less money. Then we could round off our cache with fruits and vegetables later on as we found them on sale.
Now that we had at least few weeks worth of canned foods in our cache that could be heated and served quickly and easily, we realized that there is no way we could possibly stockpile and rotate 3-6 months worth of canned food. Besides, most canned foods are high in sodium and nitrates that can also increase the risk of dehydration, and they are very heavy making them difficult to store and transport.
Additionally, canned foods typically don’t last long enough before they expire. High temperatures and damaged cans can further exacerbate the problem with botulism making them lethal to consume. I understand that they are really labeled with a “Best by” date, and I have read dozens of articles stating that this date really doesn’t matter much. However, we usually try not to push our luck and we honor them as best as we can.
 The next type of foods that we began adding to our cache were dried goods including rice, beans, sugar, flour, jerky, dehydrated hashed browns and pasta noodles, as well as some of the more common condiments, herbs and spices like salt, pepper, garlic powder, soy sauce, honey, pancake syrup and so on. Many of the dried goods can be purchased in air-tight #2.5 and #10 cans as well as 5-gallon buckets for easy storage. At some point, I would like to get a hand-crank grain mill and begin to store wheat and corn.
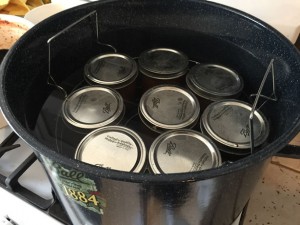
My wife and I also built a vertical garden area so we could start growing our own herbs and vegetables. This coupled with frequent trips to our local whole foods store, we began canning what we could. Canning is a highly effective way to build up a stockpile of healthy fruits, vegetables, meats and sauces. Even soups and stews that are more nutritious can be canned for a fraction of the cost. However, without preservatives, they tend not to last as near long so they must be eaten and replaced regularly.
In addition to canning, my family and I have also begun to dehydrate our own fruits and vegetables when we find them on sale. Dehydration is a popular method of preserving food that has been used by humans for thousands of years and can be eaten even when it isn’t possible to reconstitute with water. Dehydrated foods are typically less expensive than freeze-dried foods, and can even be dried with little or no equipment. A simple smoker or sun table is all that you really need. Although, multi-tray dehydrators can increase your productivity a great deal.
Preparing foods for dehydrating and the cleanup afterward can be daunting at times so I like to make it a fun project with my granddaughter when I can. We like to dehydrate apples, apricots, bananas, grapes, and plenty of nectarines. But when I make jerky, that is when the whole family gets really excited. Next, I would like to try my hand at putting together complete dehydrated meals like casseroles, soups and stews where the ingredients can slowly cook together as they reconstitute.
 There are many other types of survival rations available that are specially designed for long-term storage, each with different qualities that can have a huge impact on a preparedness plan. This is why my plan always remains flexible and I diversify as much as I possibly can to keep from getting caught in the trap of relying on a single type of food. Some foods might be more compact or taste better, while others might be more nutritious or last longer. Whatever the case, in a long-term survival situation variety is the spice of life.
Freeze-dried Meals packaged in durable Just Add Water foil pouches are a very common ration found in emergency preparedness and survival caches these days. They are a compact and extremely lightweight food source with a shelf life of at least 25 years making them an ideal packable solution for bug-out bags and outdoor adventurers on day hikes and multi-day backpacking excursions.
The meal pouches are available in both 2-3 and 4-5 serving sizes, good for one to two meals accordingly. Bulk packaging on the other hand typically consists of #2.5 or #10 cans, and 3 or 5-gallon food-grade buckets which are much more cost-effective, durable and space saving. Keeping at least some of the smaller individual-sized freeze-dried meals on hand is very important. They are compact, lightweight, and very easy to manage if you need to grab them and go.
There are dozens of recipes from each manufacturer available, including many vegetarian, non-GMO and Gluten-free options. In addition to complete meals, you can also purchase individual fruits, vegetables, meats and other ingredients so you can follow your own recipes. Most freeze-dried foods simply require a small amount of boiling water and a few minutes to reconstitute the mixture. However, there are a few recipes available that require cold water instead of the Chicken Salad from Mountain House. A great option when you don’t have any hot water available. I think that it is imperative to store a mixture of the recipes and packaging options.
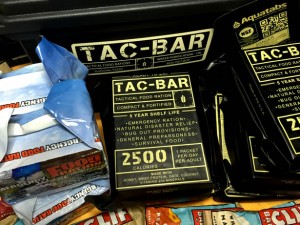 Emergency rations are another cost effective and important food storage option to keep on hand. They are extremely dense food bars fortified with vitamins, minerals and a high caloric content designed to sustain life until rescue. Some rations consist of dense fudge-like bars, while others are hard wafer-like cookies with the consistency of hardtack.
Most emergency rations can be found in 400, 1200, 2400, 2500 and 3600 calorie bricks with a 5-year shelf life, and are often sub-packaged into 200 or 400 calorie portions. They are typically vacuum sealed in durable multi-layer foil pouches so they will not spoil prematurely as long as the packaging remains sealed, regardless of the conditions that they are stored in. As a result, they are perfect for situations where you need an ultra-compact and portable food source that you don’t need to heat or reconstitute. I like to keep at least one in each of my cars and another in my EDC if I happen to be commuting more than a few miles from home.
MRE stands for Meal, Ready-to-Eat. They are completely self-contained 1200-calorie meals that require no refrigeration whatsoever, and provide all the nutrition necessary to sustain a soldier deployed in the field making them an ideal addition to any emergency preparedness solution. Military-grade MREs have been the primary ration used by the U.S. military since the mid-80s, and are nearly identical to most of the civilian MREs that are often referred to as Emergency Backup Meals (EBM).
MREs are low in fiber and high in fat content and sodium so they are definitely not ideal for a long-term food source. They are ready to eat right out of the pouch with absolutely no preparation necessary, though they taste much better warm. To heat an MRE, simply warm the pouch in the sun, drop it in a pot of boiling water, place it on a car heater, or utilize the provided flameless ration heater.
MREs typically consist of complete three-course meals including the entree, side dish, bread and spread, dessert, electrolyte beverage or instant coffee, condiments, spoon, napkin and a flameless ration heater to heat the entree. They also include matches, creamer, sugar, salt, chewing gum and toilet paper. However, many of the individual entrees, snacks, drinks and dessert can also be purchased separately.
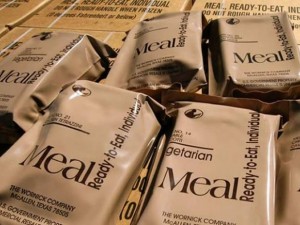 Under proper storage conditions, MREs have a very long shelf life because they are packaged in durable triple-layer foil and plastic pouches. However, the storage temperature will greatly affect their shelf life. When stored in temperatures below 60 degrees, MREs have been known to last more than 10 years, and storing them in temperatures in excess of 110 degrees can result in a shelf life of less than 1 month.
Purchasing MREs that are bad counterfeits from China, have expired, or are nearing expiration, especially as a result of being stored in a high-temperature environment would be a very risky move no matter how much they are discounted. It much safer to purchase MREs and the individual MRE components from reputable sources. Knowing exactly where they came from and how they were stored is essential to creating a survival plan that can be counted on.
Final Thoughts
The key to any successful emergency preparedness plan is to always maintain control of the plan and the many contingencies you plan for while remaining flexible enough to accommodate any changes to the plan as quickly as they occur. This is why it is so important to be organized and maintain a diverse, but well-rounded food and water storage cache. Whether you are relying on your cache due to a brief financial hardship, bugging-in for an extended period of time, or you are forced to bug-out at a moment’s notice, the supplies that you stored in your cache need to meet your current need.
Store what you eat and eat what you store. As you develop and implement your plan, it is very important to focus on foods that you and your family normally eat, and to sample the rations that you plan to include in your cache. There are two key reasons for this…
First, you will need to utilize the rations that have been rotated out of your cache as they near their expiration to avoid any waste. As your cache grows, it will become more and more necessary to utilize these meals and ingredients on a regular basis to keep up with the expiration dates and avoid any unnecessary waste.
Second, if no one likes a particular food, recipe or ingredient, then it won’t be utilized. If for example, no one in your family will eat mushrooms, simply avoid purchasing foods that contain mushrooms. Furthermore, there could be a specific brand or recipe with ingredients that are less than appealing. If you’ve already relied heavily on a particular brand or recipe, it will often go uneaten. When you and your family need to rely on every ration to survive, there is no room for waste.
 Diversify your food storage. Never rely on a single ration type, brand or recipe. Whether you are throwing a few rations together for a quick day hike, you are bugging-in during a severe winter storm, or you need to pack up the car and get out of town fast, you will likely need a completely different set of rations. Boxed and canned foods, MREs and emergency rations are wonderful food storage options, especially for their convenience and ease of use. However, they all have a moderate shelf life, whereas, dehydrated and freeze-dried foods in addition to bulk ‘staples’ are key to successful long-term food storage.
Additionally, no one really wants to eat the same thing every day, day-in, day-out, especially in the aftermath of an emergency or long-term survival situation. You and your family will be much happier when it comes time to rely on your storage cache if you have thoroughly diversified your rations.
With food rations lasting anywhere from a few weeks to 25 years or more, good organization and proper food rotation are key to minimizing spoilage and reducing waste. Simply tracking inventory and organizing stock according to First in, First out practices will go a long way toward eliminating waste without having to consciously think about doing it.
To keep costs down, it is a good idea to take advantage of any sales and seasonal surpluses whenever you can. It is also helpful to apply for newsletters and email notifications from your local grocery and big box stores, as well as reputable distributors and manufacturers.
Food storage can be time-consuming so make sure that you set aside plenty of time to stay organized and on top of the best deals.
![]()
--