Ball Fresh Preserving Kit Reviewed
Marketing from Ball
A 21-quart waterbath canner is perfect for canning fruits, salsas, pickles, jams and jellies and more. The enamel coated steel base is non-porous for easy cleaning and will not react with foods.
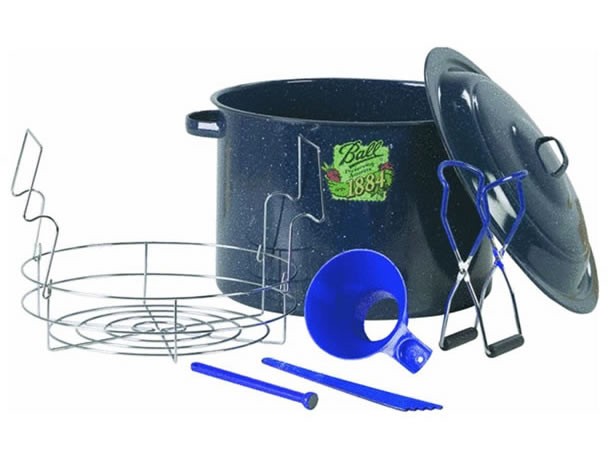
The kit includes:
21 quart capacity enamel waterbath canner that holds up to 7 quart jars
Premium canning rack, chrome plated to resist corrosion that accommodates large and small jars
Essential 4-piece utensil set
Jar Funnel: Place in mouth of jar to fill without spilling
Jar Lifter: Safely lift jars out of hot water with the blue gripping end
Lid Lifter: Lift lids out of hot water with the magnetic end
Bubble Remover & Headspace Tool: Slide into the side of filled jar to release air bubbles and measure headspace.
Manufacturer: Ball, Jarden Home Brands, freshpreserving.com
Model: Ball 21-qt Fresh Preserving KitSize: 21 Quarts
Weight: 4.2 lbs.
Dimensions: 9.4″ x 16.4″ x 14.2″
Material: Enamel-coated Steel
Origin: China
Item Number: 382646
UPC: 1440010730
MSRP: $64.99Accessories:
Ball Complete Book of Home Preserving
Ball Dissolvable Labels, 60-Count
Ball Regular Mouth Plastic Storage, 8-Count
Ball Wide-Mouth Plastic Storage Caps, 8-CountJars:
Ball Crystal Jelly Jars with Lids and Bands, Quilted, 4-Ounce, 12-Count
Ball Crystal Jelly Jars with Lids and Bands, Quilted, 8-Ounce, 12-Count
Ball Crystal Jelly Jars with Lids and Bands, Quilted, 12-Ounce, 12-Count
Ball Half-Pint Regular Mouth Mason Jars, Can or Freeze, 8-Ounce, 12-Count
Ball Pint Wide Mouth Mason Jars, Can or Freeze, 16-Ounce, 12-Count
Ball 67000 Quart Wide Mouth Mason Jars, 32-Ounce, 12-Count
The Review
As I’ve grown as a prepper, so have my survival skills. Early on I decided that I should learn as many skills as I could in order to keep my family safe in the event of a catastrophe. Along with gardening and the bounty that comes with it, attempting to master the art food preservation is a natural progression. As a result, I thought a waterbath canner would be a great place to start. In this article, I will be taking the Ball 21-qt Fresh Preserving Kit for a test drive and can some fresh salsa.
 Waterbath canning is the process used to preserve acidic foods like most fruits and vegetables, salsas, jams, jellies, pickles, sauces, and condiments. However, tomatoes must be acidified with lemon juice to be preserved using the waterbath method. Low-acid foods must be canned in a pressurized canner. Failure to follow the recipes and proper canning practices and techniques can result in serious illness. ALWAYS read the directions.
Essentially, a waterbath canner is a pot large enough in diameter to hold at least 7 quart jars and tall enough to cover them with 1 to 2 inches of water. They are typically are made of aluminum, enameled steel or stainless steel. Most kits also include some kind of rack with handles to lift the jars in and out of the boiling water and other various accessories to make things easier.
Ball has created a waterbath canning kit with all of the essential tools necessary for beginners and those who know what they’re doing to start canning immediately. The kit includes a 21-quart enamel-coated steel waterbath pot and lid approximately 14-inches in diameter and 9-inches tall capable of holding up to 7 quart jars. The steel core allows the pot to heat quickly and evenly while the enamel coating is non-porous for easy cleaning and will not react with foods and liquids. Please note that the pot is not compatible with glass stove tops.
The Ball Fresh Preserving Kit includes a chrome-plated rack that resists corrosion and holds jars of any size, large or small. The rack has two hinged handles for easy lifting. Each handle provides a support rest to hold the rack out of the water for easy access to the jars.
The kit also provides a 4-piece utensil set with jar lifter to safely lift the hot jars out of the water, a magnetic lid lifter, a funnel and a combination bubble remover and headspace measuring tool.
Canned Tomato Salsa with Cilantro
What better way is there to test out the preservation kit than to can some homemade salsa?
This recipe is based loosely on a recipe that I found posted on PickYourOwn.org with few minor variations accroding to what I had available at the time, plus some tips and tricks that I’ve learned along the way. The following recipe makes about 5 quarts of fresh salsa and demonstrates the waterbath canning process very well.
Ingredients:
8 cups peeled, cored, finely chopped tomatoes (takes about about 6 lbs)
5 cups seeded, finely chopped long green chile peppers (takes about 2 lbs)
4 cups seeded, finely chopped jalapeno peppers (more seeds left in = more hot)
2 large white onions finely chopped
4 cloves garlic, finely chopped
4 bundles fresh cilantro finely chopped
5 sprigs fresh oregano finely chopped
2 cans organic tomato sauce
1-1/2 cups lemon juice
2 teaspoon ground cumin
2 teaspoon chili powder
1 1/2 teaspoons salt
The preservation kit that I used was of course the Ball 21-qt Fresh Preserving Kit that I’m reviewing here, which also includes many of the utensils that you will need with the exception of a large spoon, ladle and a few kitchen knives. The only other items that you’ll need is a large pot to heat the salsa, a few bowls for handling the ingredients and the most of all, 8 pint-sized canning jars with rings and lids.
Step One: Prepare the Salsa
For most of this step I relied heavily on the PickYourOwn.org recipe as I had mentioned above so I will only be touching on some of the key points. Please refer to the link above for more detail.
 The first thing you need to do if you are using fresh tomatoes is to skin them and the easiest way to do this is to get some water boiling in a large pot and a large bowl of ice and water filled about half-way nearby. Once it has come to a rolling boil, add in the tomatoes. Let them cook for about 45-60 seconds then place them in the ice water. The skins will become loose and peel right off. Next, cut them in half and remove the core and seeds followed by squeezing them to get some of the water out.
I like my salsa a little less chunky than most so I prefer to zap it in a blender when I’m putting it all together. With each blender full, I add a few tomatoes, peppers, a quartered onion, garlic clove, the head of cilantro bundle, a few sprigs of of oregano, and some of the remaining ingredients to combine them thoroughly. After a few seconds on low, pour each batch into the pot and begin heating it. Repeat until all of the ingredients have been blended and in the pot, but don’t forget to stir them occasionally. Once the pot gets up to 180°F, let it simmer there for about 30 minutes to kill off any bacteria.
Now on to the next step while the salsa is doing its thing…
Step Two: Sterilize the Jars, Rings and Lids
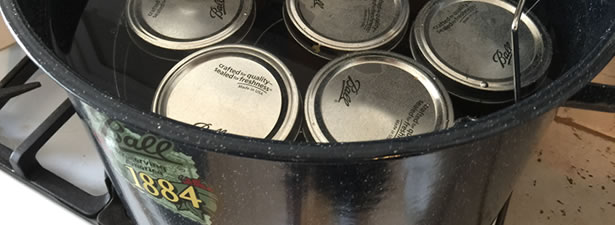
For this step, add the chrome-plated rack to the pot first, followed by the 8-pint jars and 8-rings fit loosely in between. Do not add the lids. They will be sterilized in another pot later on.
Next, fill the pot and jars inside with hot water to just above the tallest jar. If you have hard water, it is also a good idea to add a 1/2 cup of white vinegar. This will help to prevent mineral deposits from adhering to the pot and jars making it much easier to cleanup when you’re done. When it is filled to the proper height, it is time to bring the water to a rolling boil. Let it boil for at least 10 minutes before turning it down to a simmer.
In a small pot, add the lids, 1 teaspoon of White Vinegar and enough hot water to cover the lids with at least 1 inch of headspace. Heat the water to 180°F for at least 10 minutes, but do not let it come to a boil. I prefer to use a separate pot to make it little easier to fish the lids out with the magnetic lid lifter.
Step Three: Fill the Jars
When the salsa is ready, it’s time to fill the jars… In preparation for this step, I lay out a clean towel on my workspace next to the pot of salsa. This will prevent the hot jar from sliding around while I’m trying to fill or handle it. Put the ladle in the pot of salsa and lift the jar rack out of the water until the handles can rest on the top of the pot.
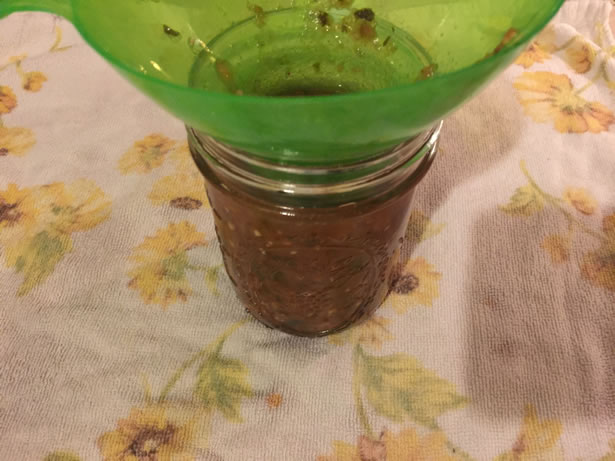 Next, gently grab a sterile jar from the rack with the jar lifter and pour the water back into the waterbath pot. Set the jar down on the towel and place the funnel on top. With the ladle, scoop the salsa and pour it into the funnel. Be careful not to fill the jar too full or get any on the rim. I like to leave about 3/4″ headspace.
Some people tend to fill all of the jars at once, then add the lids and rings. However, I don’t really have a lot of counter space to work with so I prefer to complete each jar one at a time.
Before adding the lid, I wipe the rim of the jar with a wet paper towel to remove any contaminates. Grab a lid with the magnetic lid lifter and set it on the rim of the jar. Then grab a ring with the magnetic lifter and screw it down only finger-tip tight. Be very careful not to overtighten it. There must be enough room for the air to escape to create a vacuum when it cools and seal the contents. The last thing to do with the jar is to set it back on the rack with the jar lifter.
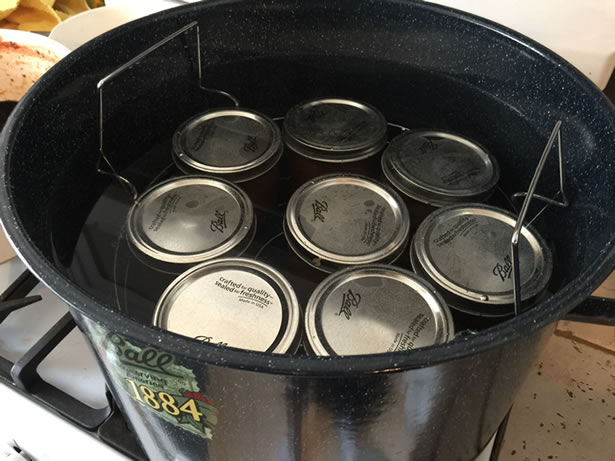 Continue filling each jar followed by adding the lid and ring until they are all back on the rack. Once all of the jars are in place, lower the rack and jars down into the waterbath. You may need to remove some excess water from the pot if it happens to become too full. With the jars full, they will displace much more water than they did empty.
Step Four: The Waterbath
The jars must be fully submerged during this process. As a result, they should be covered with at least 1 inch of water above them to ensure that they won’t become exposed during the waterbath process. With the jars fully submerged, place the pot back on the stove and turn up the heat.
Once the pot returns to a smooth rolling boil, start the timer… Leave it to boil for the full amount of time based the recipe you are following and the elevation you are at.. In my case, that was 20 minutes.
Step Five: Cooling
When time is up, remove the pot from the heat and let the boil subside a little so it’ll be safe to remove the jars.
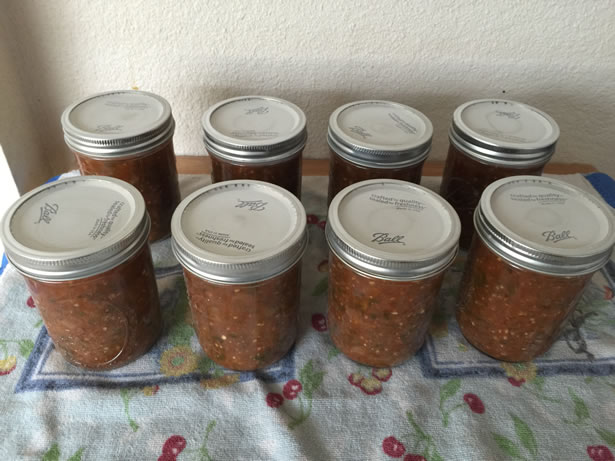 For the last step in the process, lay out a thick clean towel or double it up if you must. The towel is an important part of the process to prevent bumping the jars against the counter while they’re hot. Remove each jar with the jar lifter and place them evenly spaced apart so they cool efficiently, but not in an area with draft. You should hear the lids popping as the seals This can take all evening so it is best not to touch them for at least 12 hours. Do not rush the cooling process!
Once the jars have cooled thoroughly, remove the rings and stow them away. If you prefer to leave the rings on the jars, you should loosen them allowing plenty of airflow so they will not rust.
To test the seal, simply press the “button” gently in the center of the lid with your finger. If it pops up and down, the jar did not seal properly. You can either put the jar in the refrigerator and use it right away, or you can attempt the waterbath process over again.
Label… Label… Label… Always label your bounty with a brief description and the date. Some things can be stored longer than others so this is very important. Sealed jars should be stored in a cool, dark place. If the jars are sticky or not clean, be sure to wash them before you putting them away. Any residue left behind could attract unwanted pests.
Final Thoughts
Well there you have it… Fresh salsa with a bite! Of course I found that I will likely be tuning it quite a bit in the future. Cider Vinegar is an acquired taste. I was very impressed by the quality of the preservation kit and the utensils it came with. Aside from the jars, lids and rings, I had everything else that I needed right there in my kitchen. Cleaning the preservation kit couldn’t have been easier… The pot and accessories cleaned right up without any difficulty whatsoever.
If you have been thinking of getting into canning, this kit is for you. Made from quality materials and very affordable. Perfect whether you are a novice or a professional, and anyone in between.
![]()
About Ball, Jarden Home Brands
 The production of the first Ball® branded glass jar marks the beginning of a fascinating history. The Ball Brothers Glass Manufacturing Company began manufacturing fruit jars in 1884 in Buffalo, New York. After a destructive fire in the Buffalo plant, however, the five Ball brothers and their families relocated to Muncie, Indiana, where their business has become known worldwide.
As a leader in home food preservation, Jarden Home Brands is committed to continuing the tradition started by the Ball brothers and handed down through generations by providing quality products to help Americans preserve garden fresh produce. Join us in continuing our efforts to Preserve America for the next 125 years.
--