Enhancing the Volcano Grill

Anyone who has gotten their hands on a Volcano 3 Collapsible Grill likely has been happy with its performance with charcoal or a wood fire, but using the grill with propane usually leaves a lot to be desired. In this article, I will be discussing some simple modifications that I made to the Volcano Grill in an attempt to improve its performance, and how I modified it to operate with natural gas. But aside from a brief summary of the Volcano Grill, I am not going to cover the grill itself as an alternative cooking system in this body of text. I’ll leave that for some other time…
 The Volcano 3 Collapsible Grill is compact, portable and an extremely versatile tri-fuel cooking system perfect for bugging in, car camping, and even tailgating with a wide-variety of fuel options including charcoal, propane and wood. It is highly efficient and has many accessories including a 12″ cast iron dutch oven and reversible griddle as well as a lid that you can bake under.
I haven’t had the opportunity to test out the Volcano Grill with charcoal or a wood fire myself, but I have read dozens of positive comments on how well it works. I’ve also read a lot of negative comments on the lack-luster performance of the propane attachment so I was excited when I had the opportunity to try one out for myself, and even more excited when I was able to modify it.
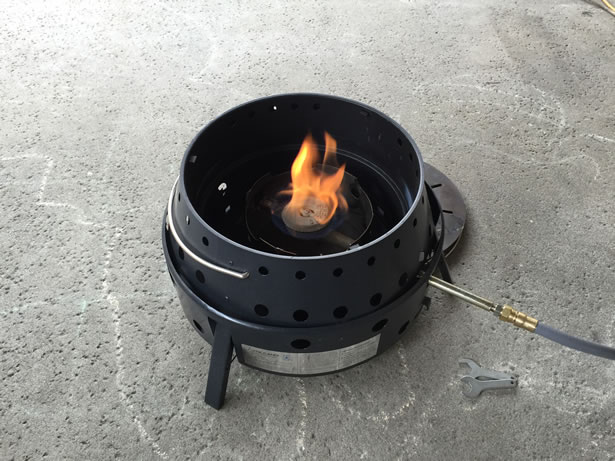
The Volcano Grill can be purchased with or without the Propane Attachment Kit which adds a nestable 19,500 BTU propane burner making it a versatile three-fuel cooking system. The attachment assembly consists of a propane burner, burner crown, hose and regulator assembly, orifice tube, wrenches and instruction manual. The burner was designed to operate between sea level and 11,000 feet and can easily be adapted to operate with the small 1-pound propane canisters using a simple adaptor.
Last month I had a booth at a local emergency preparedness expo where I was able to use one to boil a pot of water. I was very surprised at how much trouble that I had at getting the water up to temperature with or without the diffuser plate, that is until I removed the grill and placed the pot directly on the diffuser plate. With the valve turned all the way up, it put out far less heat than I had expected. I felt the output needed to increase quite a bit to be useful. Maybe as much as 50%.
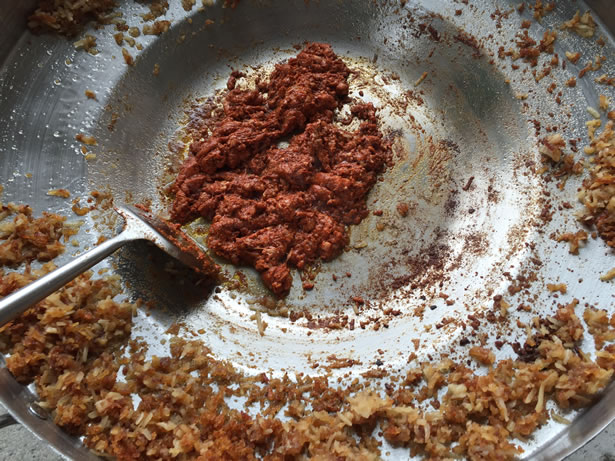 The next time that I tried my hand at cooking with propane on a Volcano Grill, I used it to cook up a large chorizo breakfast on a 22″ stainless discada. For this meal, I needed to reconstitute a few cups of freeze-dried hashed browns and fry them, cook the chorizo and egg, then mix it all together.
Normally, discadas are heated over an open fire or gas burner on a wok stand, but I was enamored by the versatility of the Volcano Grill and wanted to see if I could use it with a discada. The obvious challenge that I had to overcome was the enormous size of the bowl. Without leaving enough room for the exhaust to exit, the discada would have easily smothered the flame so I had to place the discada up on the grill. However, I wasn’t very happy with the discada sliding around so I figure I would weld up two rings and a few struts to hold the discada up off the grill when I have a chance.
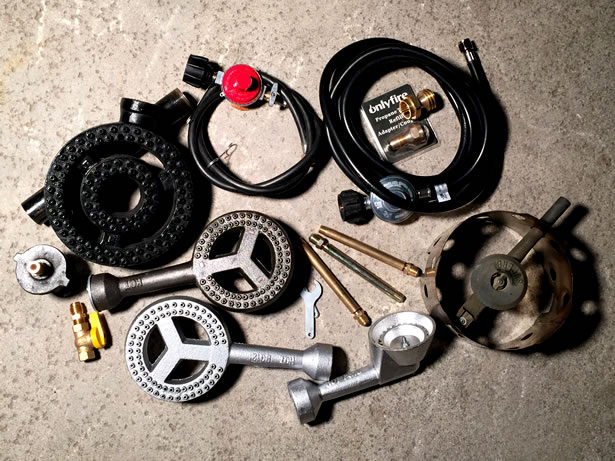
The second challenge that came up was was trying to bring the water up to a boil. I needed the water for reconstituting the hashed browns, and later I would need the oil hot enough to fry them. But that was not going to happen without a bigger flame so I made the best out of the situation and finished my breakfast while I worked on a more permanent solution in my head. After cleaning up, I inspected the parts and came up with a plan.
 There were two things that I really wanted to accomplish here… First was to increase the output of the burner by at least 50% with propane (LPG), and second to make the grill work with natural gas (LNG) as an alternative fuel. But before modifying anything, I checked on the availability of replacement parts. A complete Propane Attachment Kit is available for purchase directly from Volcano Grill as is the orifice tube. But the cast iron burner is not currently sold separately like the orifice tube. I hope that Volcano Grill will make them available separately in the future.
The Propane Attachment Kit includes a high-pressure regulator that provides a working pressure of 10 psi, a cast iron burner with the air intake cast in, and an orifice tube with a .021″ hole which equates to drill size 75. Propane at 10 psi sent through a .021″ orifice should be generating right around 19,500 BTU provided the air mixture is in tune. The high-pressure conversion chart that I used in my research was provided by Joppa Glassworks, and the low-pressure conversion chart that I used for the natural gas modifications was provided by Anderson & Forrester.
In order to increase the output by 50% with propane regulated to 10 psi, I would need to open up the orifice a full-hundredth of an inch to .031″. I would likely need to increase the size of the air intake as well to accommodate the additional fuel volume. But before making any modifications, I purchased a couple more orifice tubes directly from Volcano Grill so I could run some additional tests to see if the burner itself would be capable of handling the additional volume.
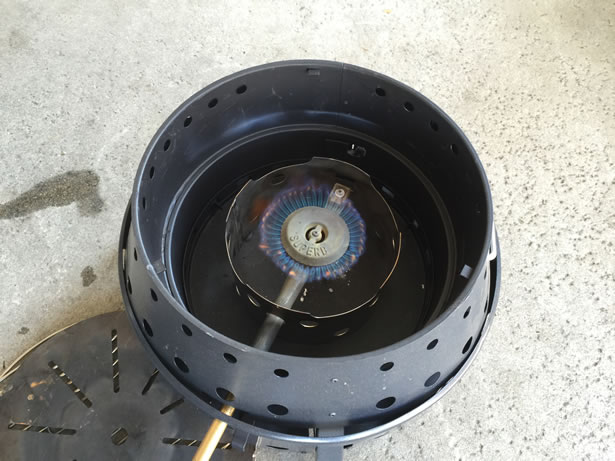
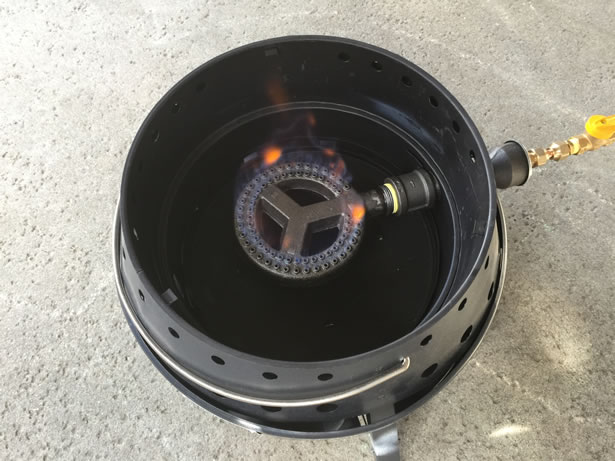
 I went ahead and drilled out the orifice using a #68 drill bit which equates to .031″, but once I had opened up the hole, I quickly realized that maybe I had stepped up a bit too aggressively on my first attempt. I suppose that I wasn’t expecting the additional gas to be quite as significant. The flame went from blue to a bright orange at the tips which is a sure sign of starving for air so the air inlet would need to be enlarged to use this burner.
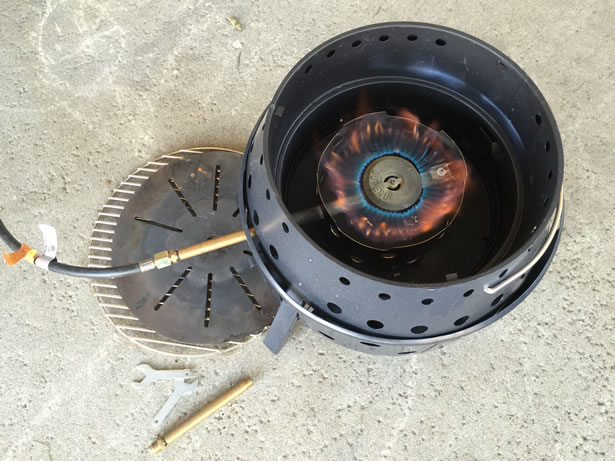
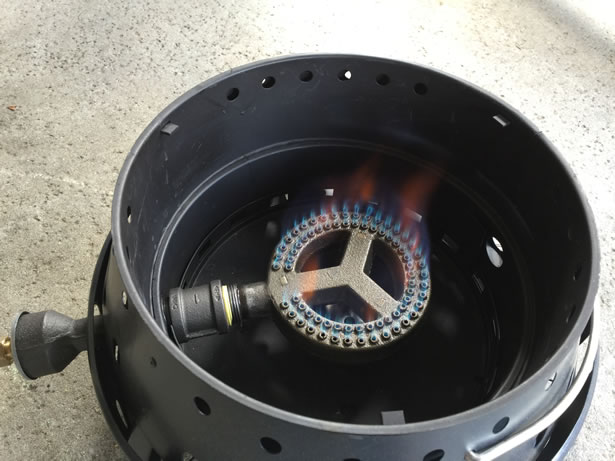
Now that the tips of the flame were high enough to tickle the bottom of a pot sitting on the grill, I am confident that it will work very well with the discada. I simply needed to enlarge the opening of the air intake a little to increase the efficiency of the flame. To do this, all I needed was a small grinder and a little patience. I gently removed about 1/8″ of material increasing the volume of the air inlet by about 50%. Any more and I think I might begin to negatively impact the air/fuel mixture. I also cut out a 1.5″ x 1.5″ piece of a soup can and rolled it over the air intake so I could adjust the volume as needed.
Once I had enlarged the air intake, the flame went from a bright blue to a dull yellow at the tips with a random streak of orange here and there. Definitely a huge improvement. I could also enlarge the burner holes to help accommodate the additional fuel volume, but I don’t think that is really necessary. If I attempt any other propane modifications, I might try using a higher-volume burner.
Right after finishing up with the propane modifications, I decided to take the discada out for a spin to test out the higher output. But first I needed to get everything ready ahead of time. I finely diced one pound of pork and one pound of beef, moderately salted and peppered before mixing them thoroughly. Next, I diced up a bunch of cilantro and garlic, then I thinly sliced one small onion, one jalapeno pepper and one serrano pepper.
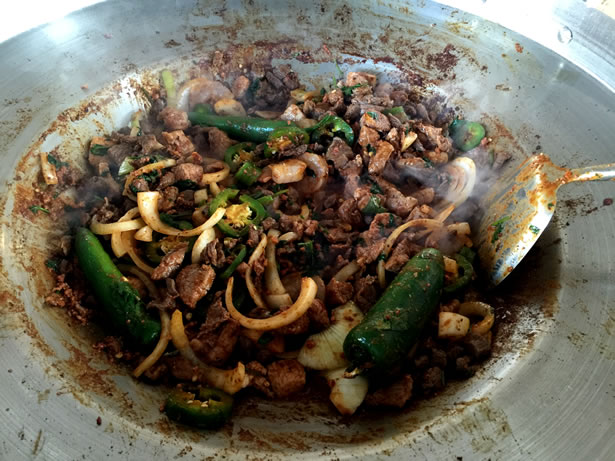 Immediately after placing the discada over the flame, I added a dash of oil and one pound of chorizo, breaking it up until it began to loosen up. Then I added the pork and beef mixture, coating it entirely with the chorizo. Once the meat was almost done, I added in the cilantro, garlic, onion and peppers. As soon as the onions began to look translucent, I added a dozen cleaned shrimp, mixing thoroughly for a few more minutes before turning off the heat.
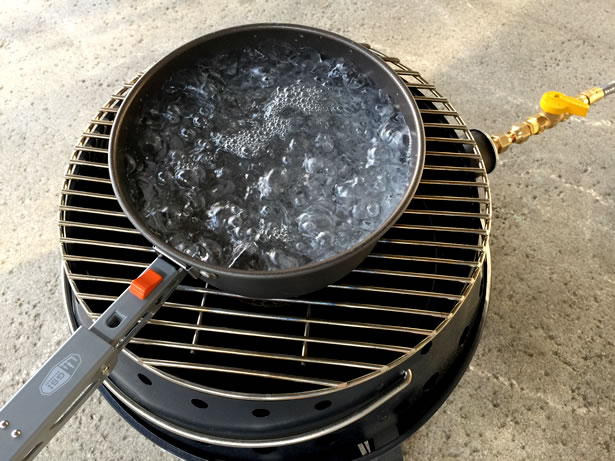
After putting my creation into a large serving bowl, I threw the discada back on the grill and added a few liters of soap and water so I could start cleaning it. Within a few short minutes the water was starting to boil so I shut it off again. I even had to let it cool a little before I could clean it. The Volcano Grill and the discada worked amazingly well. No problem whatsoever getting it hot enough to boil water this time around. Just make sure to take the flame diffuser out when you need the flame that high up on the grill.
My next goal was to make the Volcano Grill work with natural gas…
Since natural gas operates at such a low-pressure, appliances do not need regulators and the diameter of burner orifices are typically much larger than with propane. Anyone who has ever converted a propane barbecue to natural gas has likely experienced that as well. For reference, 1 psi is 27.7″ of water column (WC). The common operating pressure for natural gas appliances is 7″ WC which equates to about 1/4 psi.
 I picked up a 10′ universal connector hose for the natural gas, connecting one end to the gas source and the other to the end of the newly modified orifice tube just to see how well it would work with natural gas. Once everything was tightened and ready to go, I turned on the gas and lit the flame. At 3,451 BTU I really wasn’t expecting much, and that is exactly what I found. The flame was small and solid blue, but it did not generate very much heat.
In order to reach 30,000 BTU with natural gas, I would need the orifice to be .0935″ in diameter. But since I decided to step up a little more slowly and test along the way, I opened up the hole in a spare orifice using a #54 drill bit which equates to .055″. I used a different tube because I still needed the other tube for the 30,000 BTU propane modification. Natural gas pressurized at 1/4 psi passing through a .055″ orifice should produce as much as 10,862 BTU. The flame was about three-times the size, but I could tell that the flame was in need of more air.
The next size hole that I tried was .076″ using a #48 drill bit. At this size, the natural gas should provide as much as 20,740 BTU. The flame was huge and almost completely yellow and orange in color so it was definitely starving for air. But I just couldn’t modify this burner any further. Simply, there was no way that I could make this burner operate at such a low-pressure. As a result, I had no choice but to find another burner to reach 30,000 BTU with natural gas.
 I purchased quite a few different options on Amazon trying to find the right one, but all of them were cast as a single piece, and the burner tubes were a little too long to fit and have the burner centered in the Volcano Grill without a complicated modification. After expanding my search to include eBay, I stumbled upon an 8″ two-ring burner 50,000 BTU burner. From the pictures, I thought this burner would be ideal due to the removable burner tube. It even comes with a standard #31 orifice for natural gas, and there are a wide-variety of 1/8″ NPT orifices available to adapt it for propane no matter the pressure.
I picked up the box when it arrived at the door and had couldn’t understand why the heck it weighed so much. Then I opened it up and the disappointment quickly set in as soon as I laid eyes it. The burner was an enormous cast iron two-ring burner with a 1.5″ OD burner tube nearly 12″ long. There was no way this thing was going to fit without modifying the grill itself. The holes in the side of the Volcano Grill were only 3/4″ in diameter. Half the diameter of what I needed.
 At that point, I felt that I only had two options left… Adapt the Volcano Grill to accommodate the 1.5″ burner tube for the huge 50,000 BTU burner -or- cut and splice one of the 6″ 30,000 BTU burners that I had purchased from Amazon so it can pass through the sidewall of the Volcano Grill. Both options provide the ability to adjust the air/fuel mixture from outside of the grill as opposed to inside the grill which is a advantage for either burner assembly, but both of them also required enlarging the two holes in the sidewall of the grill.
Both of the burners had plenty of pros and cons to weigh in… The 50,000 BTU burner puts out a huge flame and a lot of heat. Tim Taylor would have been all over this… Ough ough ough ough! But to me it seemed a little too big for the Volcano Grill once I saw it in action. Not to mention, the damn thing weighs nearly 15.5 pounds all by itself. Additionally, the holes in the sidewall needed to be opened to 2″ in diameter.
The 6″ 30,000 BTU burner on the other hand seemed like it would be a much better fit for the grill. However, it needed to be cut and spliced in addition to widening the two holes to 1-3/8″ in diameter. After some deliberating, I opted for making the smaller holes and using the smaller burner.

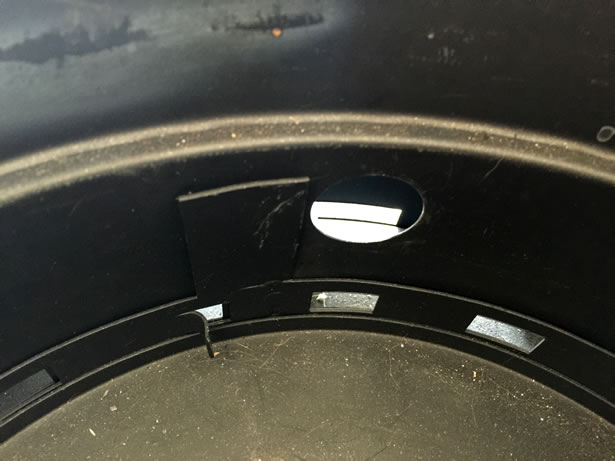
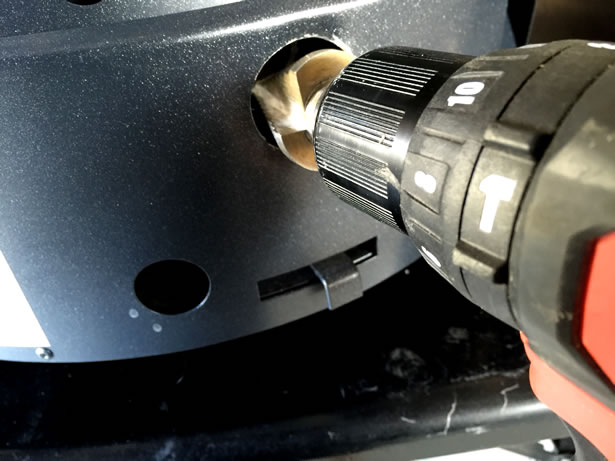
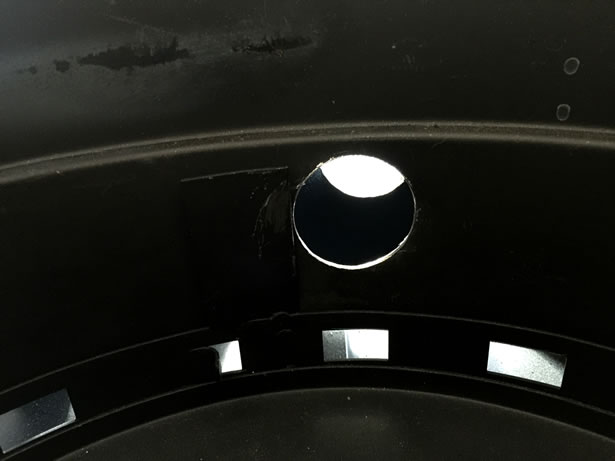
Widening the holes was pretty straightforward with my trusty Milwaukee cordless drill and a large step drill bit. However, the Volcano Grill is made from a heavy-gauge steel so drilling through the sidewalls was slow going. It is important to be patient, letting the drill and bit do the work. Especially when using a step drill. Next, I deburred the holes with a half-round file and painted them with a heat-resistant dark-grey Rustoleum paint to protect the metal and prevent it from rusting.
Next, I enlarged the hole in one of the orifices that I had purchased from Amazon. Initially, it was drilled out to #57. But for an orifice setup for natural gas capable of supplying as much as 30,000 BTU, I needed a #42 hole.
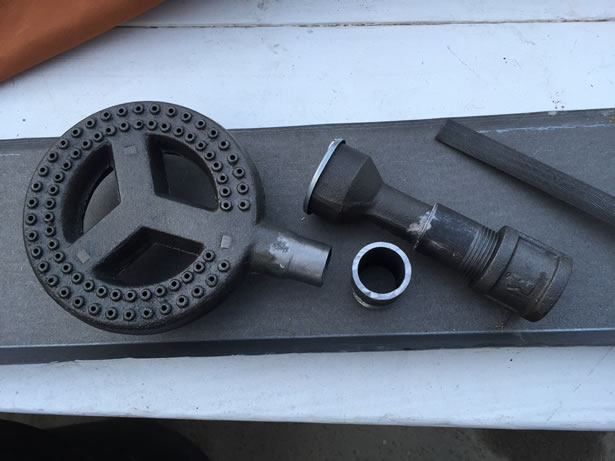
The cast iron burner tube is very difficult to cut with a standard metal-cutting saw because the metal is so hard. Abrasive blades work best for cutting cast iron. The first cut that I made, I split the burner tube in half leaving 2″ on each side. For the second, I carefully cut the entire threaded area off one end of a 1″ x 3″ black iron nipple. Regular fine-tooth metal-cutting blades work best for cutting iron pipe.
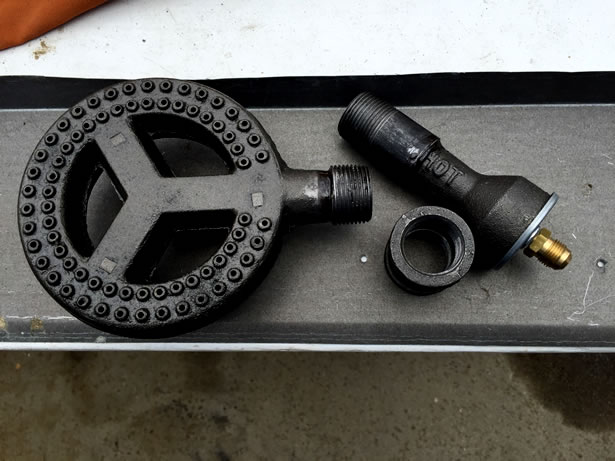
With a 3/4″ half-round file I cleaned up both sides of the two cuts and began to round and thin the outer walls of the burner tube about 1″ from the end. I also filed the inside of the black iron nipple pieces until they fit over the burner tube. The 2″ nipple piece was for the end with the air intake bell, and the 1″ nipple piece was for the end with the burner. Once they fit snugly, I mixed up some JB Weld and epoxied the ends in place. I was sure to leave a smooth bead of epoxy at both ends of each joint to insure a proper seal.
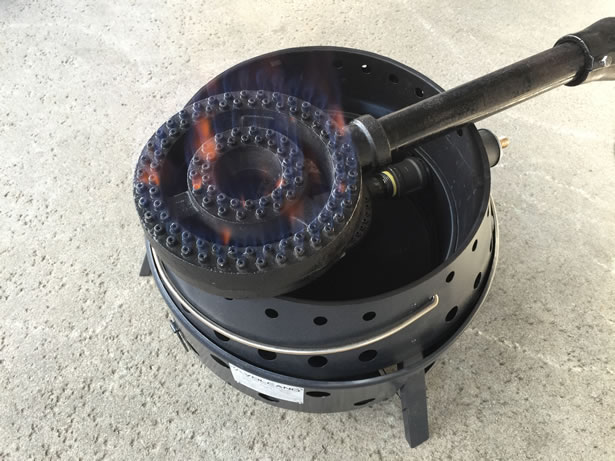
 I made a small foot to stabilize and support the weight of the burner inside the grill with a small piece of steel welded onto the end of a screw that was partially threaded into the back of the burner. Once the epoxy had a enough time to thoroughly cure, I assembled the burner through the wall of the Volcano Grill using a 1″ coupling and ran gas supply from the source to the orifice located on the end of the air intake bell with a 3/8″ gas valve plumbed inline for safety.
I opened the valve about half-way and lit the flame before turing it all the way up. After taking a few pictures, I threw the grill over the top and filled a pot with 2 liters of water so I could see how long it would take to boil. After a couple of minutes, I noticed the grill was glowing red so I turned it half-way down. Two more minutes on medium and the water had reached a rolling boil.
After the boil test was done and I turned off the flame, I removed the pot from the grill and noticed that it had gotten hot enough to distort the grill… Even though I didn’t go with the 50,000 BTU burner, I think Tim Taylor would have been proud of what this one can do.
To adapt the 30,000 BTU burner to work with propane, all it needs is a smaller orifice and a propane fuel source. Using the 10 psi pressure regulator that came with the Propane Attachment Kit, the orifice would need a #68 hole, but the only orifice that I could find on Amazon had a #57 hole which is much larger than needed so I had to plug the hole with some JB Weld and poke a new hole with a #68 drill bit to get just the right volume of propane to feed the burner with the most efficiency.
 There are literally hundreds of regulators available with a wide-variety of hose lengths and working pressures, including some that are adjustable. At that point, it is simply a matter of matching the diameter of the orifice with the working pressure to reach the desired BTU output. With a custom burner assembly and aftermarket regulator, maybe I don’t need the Propane Attachment Kit after all… Being able to hook the grill up to natural gas is rather convenient.
The flame from the burner attached to propane and configured to provide 30,000 BTU seemed to put out the about same amount of heat as it did with natural gas. I really couldn’t feel a difference. I still had to turn the flame down with the grill sitting on top to prevent it from melting like I had to with natural gas. Is it a bad thing if my grill is capable of melting steel? I don’t think so… And I am sure some would agree!
Final Thoughts
I chose to present this article in a way that documented my thoughts, choices and progress along the way whether or not they were successful in order to share my experiences rather than a any old how-to-guide that ignores the failures. I wholeheartedly believe that a failure is only a failure if you don’t learn something from it. Now I know quite a few new things not to try again.
These modifications and experiments have been fun and entertaining for me, and I learned quite a few things along the way. I only hope that sharing my trials and tribulations might give you some new ideas to try and save you from making some of the same mistakes that I made along the way.
Working with flammable gases can be very dangerous. Even more so in an enclosed area. Not only is there a severe risk of fire or explosion, there is also a serious risk of asphyxiation. In a past life I was a licensed plumber so I have had a lot of experience over the years working with gases and appliances. Please know and understand the risks before trying anything dangerous.
![]()
--